As a holiday project, I started making a small game. When building a system to display dialogue to the player, I became curious if I could make a typeface of my own for it. Surely it wouldn’t be too hard to make a decent-looking pixelated font for it.
I quickly found a nice website, BitFontMaker2, that gives you a grid of pixels to draw out your characters, and then download a .ttf font file build from them, plus a bit of metadata. In an afternoon I had a custom typeface not just in my dialogue boxes, but also on the whole interface.

My new font, in the pause menu.
Then I continued on with my game. As I added more and more text, I found some character combinations that didn’t look too nice.

“o” and “t” are a bit
too far apart.

The same goes for “fo”.

And even more so
for “Ta”.
Modern computer typefaces can adjust the spacing between specific pairs of characters. For example, a lot of fonts reduce the space between a “A” followed by a “V” so that their parallel lines are closer together.
In the font that this blog uses, it’s fairly obvious if you compare the spacing in “AM” with “AV”. This is called a kerning pair.
I’m using Godot as the engine for my game, and it supports kerning, along with a few other font features like replacing characters according to surrounding ones, and replacing a few consecutive characters with a single glyph. (contextual substitution and ligatures, respectively)
So I asked myself: How do I do that for my font?
And then, I discovered the mess that are typeface design tools.
The Search for Software
Looking around on the internet, I found a few options. Most of them are paid:
- Glyphs:
Nominally €299, they charge me CL$357,245 (~€359)
Mac Only. - Glyphs Mini:
Nominally €49, they charge me CL$59,728 (~€60)
Mac only as well,
It’s a more limited version of Glyphs. - FontLab:
Nominally US$499 plus tax, they charge me CL$596,204 (~US$629) - FontLab Studio:
Nominally US$649 plus tax, they charge me CL$775,424 (~US$818)
Mac and Windows.
From what I could gather, and old version of FontLab. - TypeTool:
Nominally US$49 plus tax, they charge me CL$58,548 (~US$61)
Mac and Windows.
A simplified version of FontLab Studio. - RoboFont:
€400 or US$490, and only charge in euros or dollars.
Only for Mac
I’m going to complain about the way Glyph Mini displays its price: in the download page it shows “€49”, but if you go to purchase it, they’ll actually charge you €49.99.
In chilean pesos (CL$), a 19% VAT is included, and the exchange rate they offer is not very good.
A few other programs are free:
- Birdfont (source code):
Windows, Linux, Mac and BSD. - FontForge (source code):
Windows, Mac and Linux.
Tangent: Price formats
When writing this post, I needed a way to tell CLP and USD apart (both use the same symbol locally, $). The ISO standard is to just use letters, “xxx CLP” and “xxx USD”. I don’t really like it, it’s kinda boring that neither gets to use its symbol. Also, for consistency, I’d have to use “xxx EUR”, even when the euro symbol € is not ambiguous at all.
Something that seemed reasonable was to do a mix of both: “CL$xxx” or “CLP$xxx” (though with both ‘P’ and ‘$’ it feels kinda redundant). While this is fine, I don’t find it particularly readable.
I also thought of using emojis, like “🇨🇱$xxx” but it’s a bit annoying to write emojis so often, and doesn’t look too good.
Additionally, I tried to place the ISO code above the symbol, if the symbol is not clear: “CLP$xxx”. It’s not particularly elegant, but it seemed decent enough. When selecting and copying the text, it’s copied as “CLP$xxx” which is perfectly fine. However, it uses up too much of the space between lines, making the text look cluttered.
In the end, I decided to go for something similar to the first option, but with the disambiguating text in a dimmer color: “CL$xxx”. I think it’s easier to read than just “CL$xxx”.
I also found out that not all countries write euros the same way around: Spain, Germany, France, and others, use “xxx €”, while Ireland and England use “€xxx”. I’d assume this is common knowledge in Europe, but I had no idea.
Ok, maybe saying its a mess was a bit of an exaggeration. But the prices are way too high for small personal projects.
I don’t have an Apple computer, so any options that only support MacOS are immediately discarded. Also, since the whole point of this is to make a font for a small game I’m making in my free time, and that will most likely be free, it doesn’t make much sense to go with a paid option: They’re either way too expensive, or they’re a bit too limited.
Thus, I have two options: Birdfont and FontForge. After trying out both, neither was perfect:
- Birdfont is a more modern program, but it’s interface is a bit confusing, and not everything works quite right (For example, not everything can be undone, especially in the metrics part of the program).
- FontForge seems to be able to do a lot more, and even if its interface is a bit old, with lots of menus and windows, it’s not that hard to navigate. However, it tends to crash when saving a project, even leaving the file completely empty, losing everything in the project.
I ended up choosing FontForge, since the bits I need (for kerning) seem to work a bit better. I just need to remember to keep lots of backups.
FontForge
This next bit will be a tutorial, sort of. FontForge has a fairly good tutorial, from which I learnt most of the stuff I ended up using. Still, I had to figure a few things out myself, so I’ll explain what I did in case someone finds it useful.
When opening my already built font, FontForge shows all its glyphs. When double clicking on one, a window appears for editing its shape. Since my glyphs and characters are pretty much done, I didn’t use this window much.
FontForge’s main window.
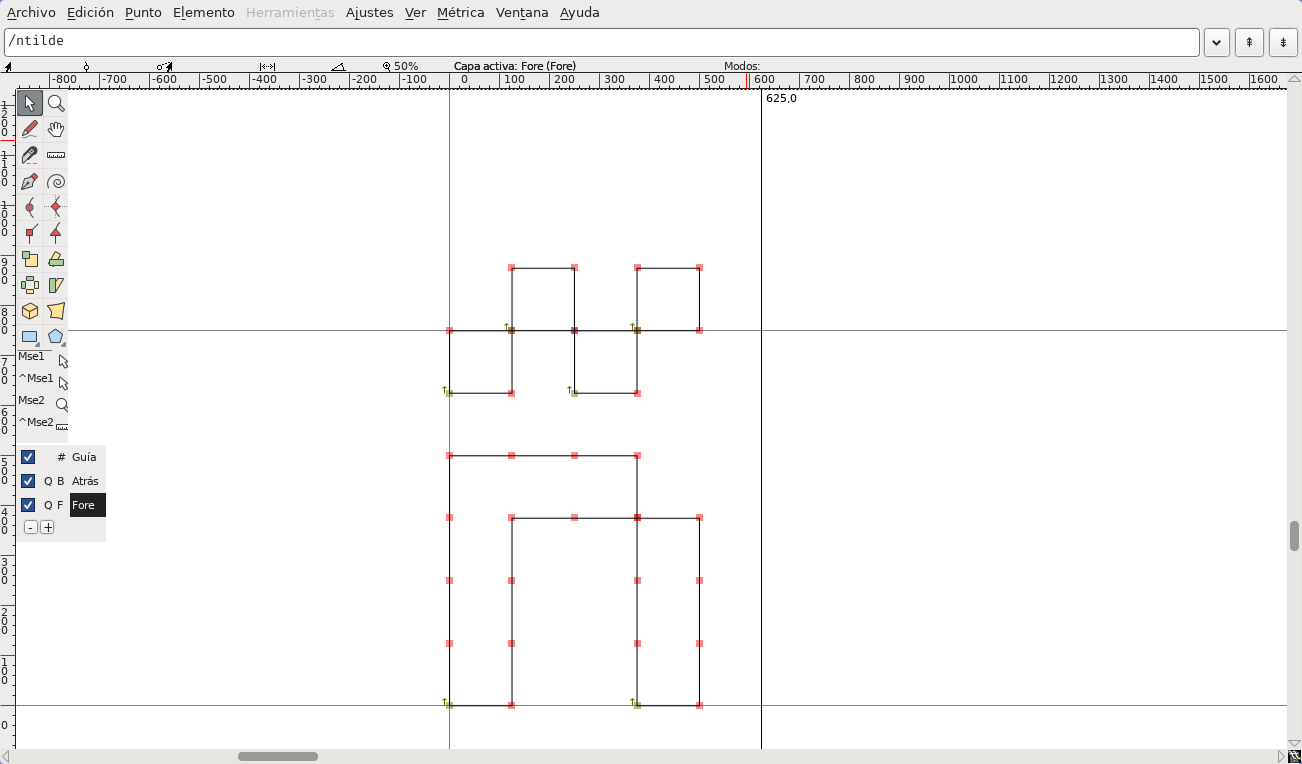
The glyph editing window.
The kerning between character pairs is changed from a different window: Element > Font Info > Lookups, in the GPOS tab. Here, a new Lookup has to be created, with “Pair Position” type and with the kern feature. This last bit is important, it’s what lets programs know that your font supports kerning.
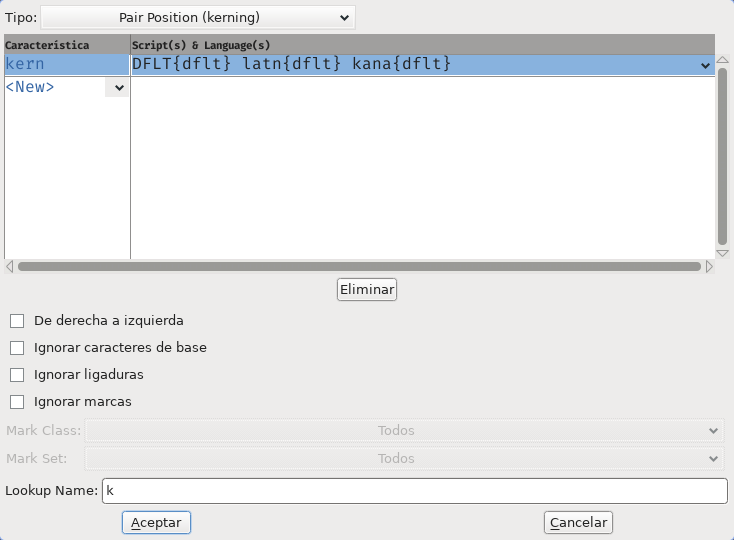
A new kerning Lookup.
Within this new Lookup, we create a new Subtable. I chose to use kerning classes, instead of individual pairs, because this lets me change the kerning for multiple similar pairs at once. For example, the kerning between “T” and “o” is going to be the same as between “T” and “a”, and so “o” and “a” can just go in the same class.
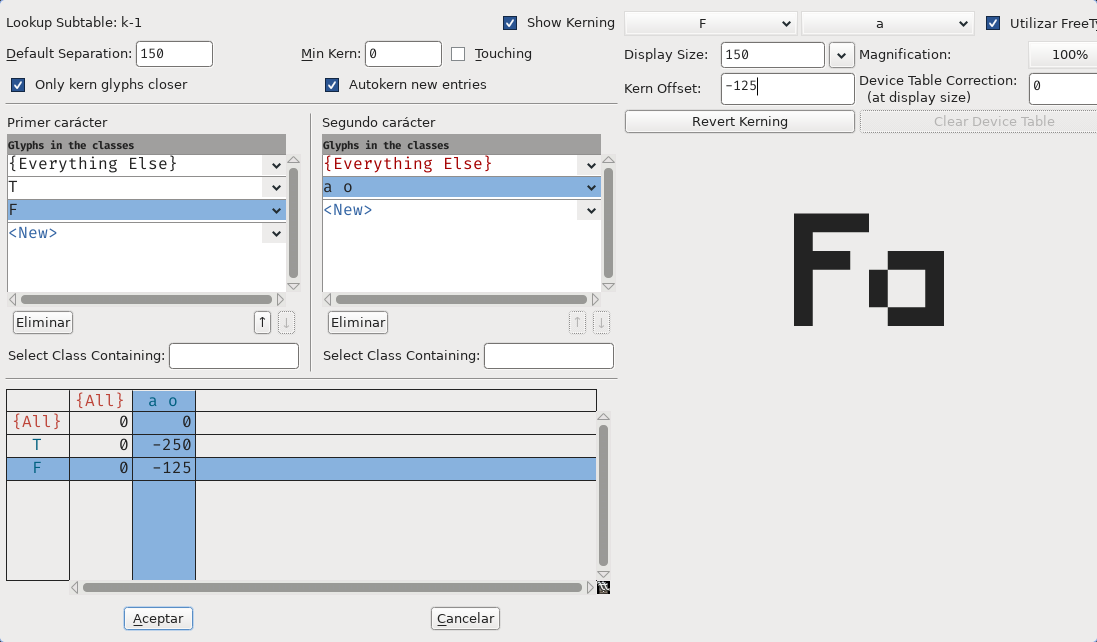
The kerning Subtable window.
At the top, you specify classes. At the bottom, the kerning between each pair. To the right,
there’s a preview, and the box to edit the kerning of the current class pair.
This is enough to make most pairs look nice. However, there’s a pair of letters that are a bit more complicated: “t” and “f”. Both have a single pixel to the left, which means that they look 2 pixels away from the character to the left.
To fix this, I used another feature of fonts: Contextual Substitution. First. I reduce the kerning with most pairs that end in “t” or “f”, to make it look 1 pixel apart. Then, if the bit to the left touches the previous character, I replace the “t” or “f” with a sick-less variant.
For this, I first made the alternate glyphs: In the top menu, in Encoding > Add Encoding Slots... I created 2 new slots. These show up at the very end. To name them, Right Click > Character Attributes, and change the Glyph Name. I called mine “t_alt” and “f_alt”. Then I copied each letter’s polygon (from and to the glyph edit window) and removed the bit to the left.
Then, I made two new Lookups in the GSUB tab: one defines what alternate glyph to use and the other defines when to use it.
The first one is of “Single Substitution” type, and its subtable simply holds character-alternative pairs.
The second one is of “Contextual Chaining Substitution” type, with the calt feature (just as important as kern!“), and its subtable has three classes: one for “t”, one for “f”, and one for the characters for which the alternate glyph should be used. On top there’s the substitution rules, in this case of the form prefix_class | class_to_replace @\<replacement_subtable> |. On the bottom, there’s the previously mentioned classes.
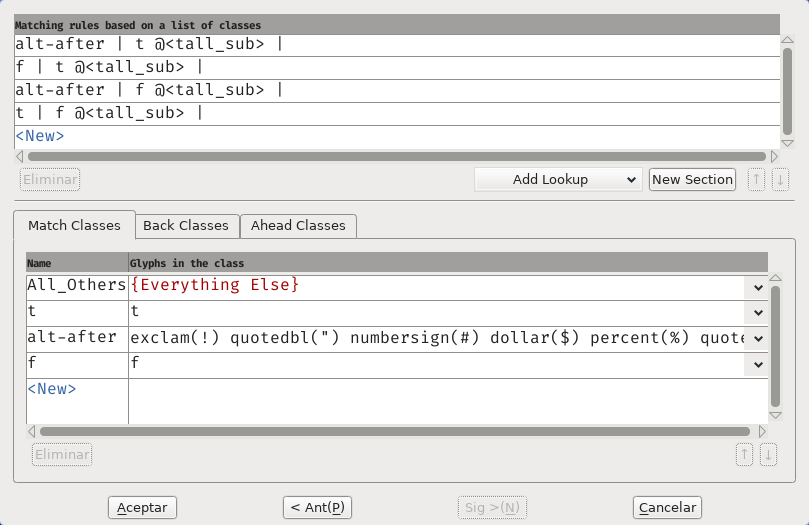
The Contextual Substitution window.
To test how some text looks, you can use the Metrics window: Metrics > Open metrics window. Here is where the program often crashes for me, so I got used to saving and copying the project file before opening the window. I’d guess it has something to do with me using Wayland, but I’m not sure.
And that’s about it. I probably missed a few pairs that still don’t look nice, but I’ll have to find that out and fix it later, as I notice them.
Besides the whole metrics window crashing stuff, FontForge is pretty alright. Feels old, sure, but that’s alright. I feel old sometimes too. I’m not sure I’d enjoy making a full typeface from scratch on it (I wouldn’t know quite how to use the shape drawing tools), but for modifying something you already have, it’s a good enough experience.
Results
Here’s the examples from the beginning, after the tweaks:

With “o” and “t”, “t”
keeps its left bit.

The “T” has a lot of empty space
that the “a” can now fill.

Between “f” and “o” the difference is
pretty subtle, but I think it looks
quite a bit better.

With “s” and “t”, “t”
looses its left bit.
And the pause menu tabs:

You can see the changes in “St” and “at” in “Status”, and in the “ett” in “Settings”
I’m pretty satisfied with how it turned out, and it wasn’t too painful.